Make Your Own Dinosaur Fossils

Anyone who follows the blog or knows us in real life knows that I have a little man who is obsessed with dinosaurs. And I mean OBSESSED! He usually has at least one in tow where ever he goes and his guttral ‘ROAR’ is pretty damn impressive for a two-year-old. A few weeks ago we were looking for something to when I came across the very simple – yet effective – idea of dinosaur fossils.
Dinosaur fossils are a quick, easy (and relatively mess free) craft activity for kids who love dinosaurs. Let their imaginations and creativity run free as they create their very own dinosaur fossils using nothing more than some salt dough and their favourite little dino toys. Here’s what we did.
DINOSAUR FOSSILS SALT DOUGH
The basis of the fossils is salt dough which really is the easiest thing to make. If your little one is old enough they can help mix it with you. Alternatively just mix it up yourself pre-crafting so it’s good to go. When I say easy though I really do mean EASY. Literally mix together 2 parts flour to 1 part salt. Slowly add in 1 part warm water and knead as you go until you have a good consistency.

And that’s it! For dinosaur fossils I used a ‘cup’ measurement so literally 2 cups of flour, 1 cup of salt and then 1 cup of warm water added slowly and mixed in. This was enough for 4 fossils and a big chunk left over that the Bear was just happy playing with. I didn’t bother adding food colouring as I thought that the natural colour of the salt dough would make a perfect base for fossils.
MAKING YOUR DINOSAUR FOSSILS
Now you have your dough, here comes the fun part. Also super easy.
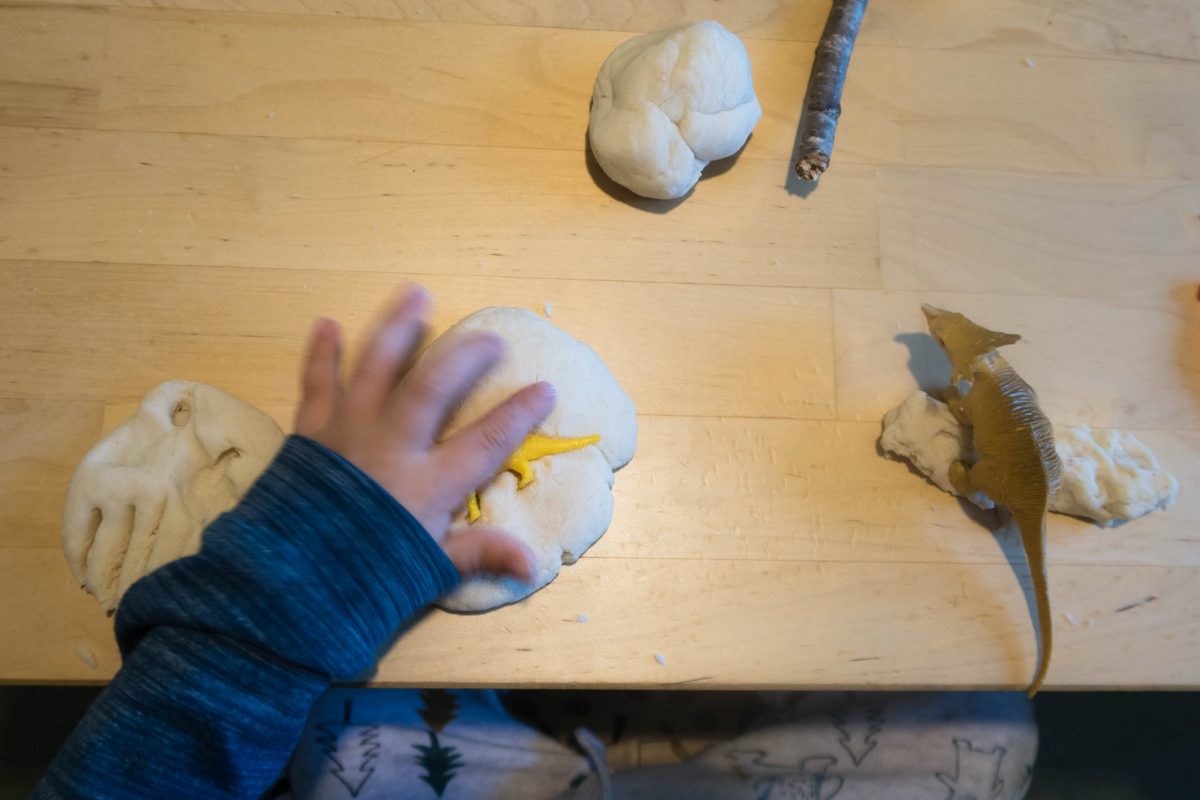
If your child is anything like mine, they already have an impressive stash of little plastic dinosaurs. All they need to do is collect up all their favourites and they have everything they need to start creating their dinosaur fossils. We also collected a few bits of sticks and leaves to make some great shapes too.

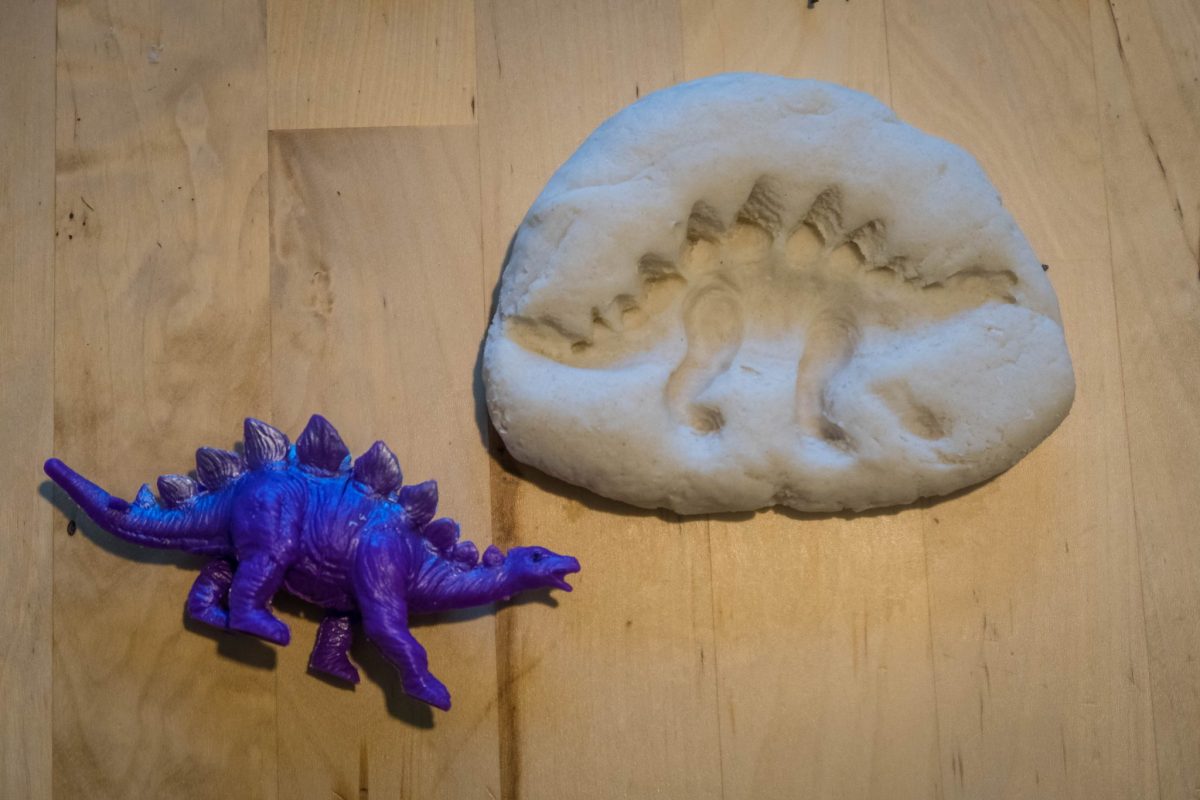
Split your dough into portions and section off into smaller balls. Push flat and then using your chosen dinosaur, push down into the dough to create a fabulous dino shaped imprint. And that literally all there is to it. I told you….so simple and easy!
TIME TO BAKE
You then have two choices: you can either leave them to dry out on the side for a few days, or you can speed up the process by just popping them in the oven for a few hours. None of us have the patience to wait for days so I just put them on a baking tray and into the oven on really low – around 70C – for around 2 or 3 hours. Don’t be tempted to turn the heat up, as flour + heat just means that they’ll rise.

THE FINISHING TOUCHES
What you should have now is a set of fabulous looking fossils which are now dried out and hard. Never happy to leave things there and keep it plain and natural looking, the next thing my two were desperate to do was decorate them. Which they did with glee. For this we just used normal poster paint and just got messy!

Once fully dried out, you’re not quite done yet (but I promise that we’re almost there!). Salt dough is essentially food so if you want them to last, then you need to seal them. For this I just paint a layer of mod podge on which also gives it a nice shiny finish. Any PVA glue or similar will do though.

There we have it. Some fully finished and fabulous dinosaur fossils. What you use them for is up to you but what about adding them to a frame for some dino decorations. Or perhaps burying them in the sandpit for some serious excavation work. Or even pushing a hole through and adding string to create some fabulous dinosaur themed hanging decorations. Whatever you decide, this should keep your little ones enterained for an hour or so!!
If you enjoyed this little idea, then why not check out the Simple Makes section of the site for more.

This sounds like such a fun project!!